Lambda表达式方法引用举例_lambda函数引用-程序员宅基地
文章目录
Lambda表达式引入
假设我们现在有一个遍历集合List的需求
a.首先我们通过Lambda表达式的写法实现:
代码如下(示例):
public class MyLambdaTest {

    public static void main(String[] args) {

        List<String> stringList = Arrays.asList("肌肉猿","肌肉猿爱编程","程序员非晚");
        stringList.forEach(s -> {

            System.out.println(s);
        });
    }
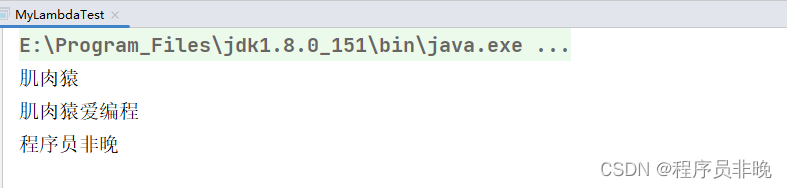
程序运行结果:
b.我们通过匿名内部类的形式实现
public class MyLambdaTest2 {

    public static void main(String[] args) {

        List<String> stringList = Arrays.asList("肌肉猿","肌肉猿爱编程","程序员非晚");
        // 通过匿名内部类的形式替代Lambda表达式
        stringList.forEach(new Consumer<String>() {

            @Override
            public void accept(String s) {

                System.out.println(s);
            }
        });
    }
}
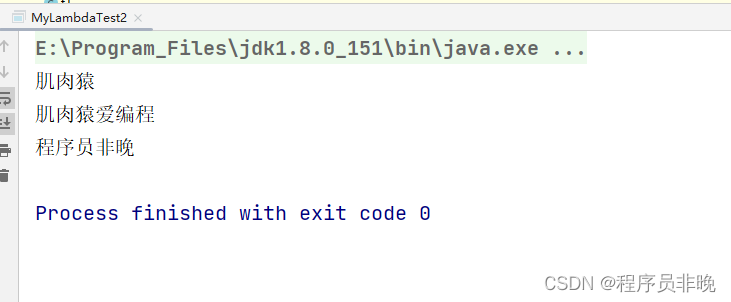
程序运行结果:
上述代码分析:
foreach()方法是Iterable接口的一个默认方法,在下面的方法的参数列表中我们可以知道,该方法需要一个Consumer类型的参数,方法体的内容则是一个for循环,进行对每一个对象的便利,最终处理方法则是调用accept()方法。
default void forEach(Consumer<? super T> action) {

        Objects.requireNonNull(action);
        for (T t : this) {

            action.accept(t);
        }
    }
当我们继续查看Consumer的accept(T)方法,我们不难得出Consumer是一个函数式接口(该接口的详细讲解见我专栏里的文章有详解)。
@FunctionalInterface
public interface Consumer<T> {


    /**
     * Performs this operation on the given argument.
     *
     * @param t the input argument
     */
    void accept(T t);

    /**
     * Returns a composed {@code Consumer} that performs, in sequence, this
     * operation followed by the {@code after} operation. If performing either
     * operation throws an exception, it is relayed to the caller of the
     * composed operation.  If performing this operation throws an exception,
     * the {@code after} operation will not be performed.
     *
     * @param after the operation to perform after this operation
     * @return a composed {@code Consumer} that performs in sequence this
     * operation followed by the {@code after} operation
     * @throws NullPointerException if {@code after} is null
     */
    default Consumer<T> andThen(Consumer<? super T> after) {

        Objects.requireNonNull(after);
        return (T t) -> {
     accept(t); after.accept(t); };
    }
}
此时此刻,我们通过对比上述的两种实现遍历集合List方式不难得出,stringList.forEach(s -> {System.out.println(s);})。
Lambda表达式s -> {System.out.println(s);}其实本质上就是实现了Consumer接口的一个匿名(内部类)对象。
大括号里的内容(System.out.println(s))相当于重写了accept()方法。
具体内部的底层实现细节见我专栏的系列文章
一、Lambda表达式的方法引用
经过目前的分析,使用lambda表达式就是传递进去的代码就是一种解决方案,拿什么参数,做什么操作,但是在使用的时候要注意冗余的问题出现。
a.冗余Lambda场景实例
首先我们编写简单接口来应用Lambda表达式
@FunctionalInterface
public interface t1 {

    void print(String str);
}
接下来我们用Lambda实现上述接口中的print打印方法
public class UseT1Test1 {

    private static void printString(t1 data){

        data.print("肌肉猿爱写Java");
    }

    public static void main(String[] args) {

        printString(str -> System.out.println(str));
    }
}
分析上述代码:
printString方法是为了调用接口t1中的print方法,不用考虑接口中的方法的具体实现逻辑以及输出方式。在main方法中通过Lambda表达式指定了函数式接口t1的具体操作方式--------拿到String类型并在控制台中输出。经过分析我们发现,对于字符串在控制台中的输出方案在类的重载中获得了明确的实现,则可以省略不用手动调用。
改进后的代码形式
public class UseT1Test2 {

    private static void printString(t1 data){

        data.print("肌肉猿爱写Java");
    }

    public static void main(String[] args) {

        printString(System.out::println);
    }
}
b.方法引用符(::)详解
定义:上述的简洁lambda表达式双冒号::称为引用运算符,其所在表达式称之为方法引用
应用场景:加入Lambda表达式要表达的函数方案已经存在在某个方法的实现中,则可以通过双冒号引用该方法作为Lambda的替代者。
Ⅰ.关于语义运算符的语义分析
上述代码中,System.out对象方法重载了print(String)方法,则对于接口t1中的函数式接口参数以下两者方法完全等效。
- Lambda表达式写法:
s -> System.out.println(s); - 方法引用写法:
System.out::println
第一种是拿到参数后通过Lambda之手,传递给输出语句进行打印输出。
ps:Lambda表达式传递的参数一定是接口方法中所书写的抽象方法可以接收的参数类型,不然会报错
第二种则是直接让System.out 中的printlnl来取代Lambda表达式,总之第二种方式复用了已有的方案更加简洁。
二、Lambda表达式各种方法引用
1.通过对象名引用成员变量
接口代码如下(示例):
@FunctionalInterface
public interface Printable {

    void print(String str);
}
当一个类中已经存在一个成员方法
public class MethodRefObject {

    public void printUpperCase(String str){

        System.out.println(str.toUpperCase());
    }
}
当我们需要使用类中printUpperCase成员方法来替代函数式接口的lambda,可以通过对象的实例来引用成员方法实现。
public class DemoMethodRef {

    private static void printString(Printable lambda){

        lambda.print("程序员非晚爱编程");
    }

    public static void main(String[] args) {

        MethodRefObject demoMethodRef = new MethodRefObject();
        printString(demoMethodRef::printUpperCase);
    }
}
2.通过类名称引用静态方法
首先还是定义一个函数式接口
@FunctionalInterface
public interface Calcable {

    int cal(int num);
}
使用Lambda表达式的写法示例
public class Demo01Lambda {

    public static void method(int num,Calcable lambda){

        System.out.println(lambda.cal(num));
    }

    public static void main(String[] args) {

        method(-1314,n->Math.abs(n));
    }
}
进阶写法就是使用方法引用
public class Demo02Lambda {

    public static void method(int num,Calcable lambda){

        System.out.println(lambda.cal(num));
    }

    public static void main(String[] args) {

        method(-1314,Math::abs);
    }
}
总结:在Java.lang.Math 中已经存在abs的静态方法
public static double abs(double a) {

        return (a <= 0.0D) ? 0.0D - a : a;
    }
上述的两种方式实际上是等效的
3.通过super引用成员方法
当类与类之间存在继承关系时,当Lambda表达式中出现super调用时,也可以使用方法引用进行替代。
首先定义函数式接口:
@FunctionalInterface
public interface Greetable {

    void greet();
}
然后定义父类中的内容
public class Human {

    public void sayHello(){

        System.out.println("hello,你好");
    }
}
最后定义子类Man中的内容,使用lambda表达式写法
public class Man extends Human{

    @Override
    public void sayHello() {

        System.out.println("大家好,我是Man");
    }

    // 定义方法Method,参数传递Greetable接口
    public void method(Greetable greetable){

        greetable.greet();
    }

    public void show(){

        // 调用method方法,使用lambda表达式
        method(() -> new Human().sayHello());
        // 简化lambda表达式 直接使用super关键字替代父类对象
        method(() -> super.sayHello());
    }

}
另一种写法是直接使用方法引用来调用父类中的sayHello方法
public class RealMan extends Human{

    @Override
    public void sayHello() {

        System.out.println("大家好,我是真男人");
    }

    // 定义方法实现接口中的方法
    public void method(Greetable greetable){

        greetable.greet();
    }

    public void show(){

        method(super :: sayHello);
    }
}
4.通过this引用成员方法
声明this代表的就是当前的对象
首先定义函数式接口
@FunctionalInterface
public interface Human {

    void buy();
}
定义一个类来调用接口中的方法
public class RealHuman {

    private void marry(Human human){

        human.buy();
    }

    public void tobebetterman(){

        marry(()-> System.out.println("真男人要买套房"));
    }
}
上述中成为更好男人方法调用了结婚方法,因为后者的参数为函数式接口,可以使用lambda表达式,当表达式的内容在本类中已经存在,可以使用this关键字替代
public class RealHuman {

    private void buyHouse(){

        System.out.println("真男人要买房");
    }
    private void marry(Human human){

        human.buy();
    }
    public void tobebetterman(){

        marry(()->this.buyHouse());
    }
}
使用方法引用则更加简单,还不用写方法后边的括号了,示例如下
public class RealHuman {

    private void buyHouse(){

        System.out.println("真男人要买房");
    }
    private void marry(Human human){

        human.buy();
    }
    public void tobebetterman(){

        marry(this::buyHouse);
    }
}
5.通过类的构造器引用
根据定义构造器的名称和类名完全一样,所以构造器引用可以使用类名称::new格式表示
首先定义一个类
public class Human {

    private String name;

    public Human(String name) {

        this.name = name;
    }

    public String getName() {

        return name;
    }

    public void setName(String name) {

        this.name = name;
    }
}
然后定义函数式接口
@FunctionalInterface
public interface Human {

   RealHuman buildHuman(String name);
}
使用上述的函数式接口有两种方式,首先展示lambda表达式方式
public class LambdaHuman {

    public static void printName(String name,Human builder){

        System.out.println(builder.buildHuman(name).getName());
    }

    public static void main(String[] args) {

        printName("肌肉猿是真男人",name -> new RealHuman(name));
    }
}
另一种更加简洁的写法
public class RealHuman2 {

    public static void printName(String name,Human builder){

        System.out.println(builder.buildHuman(name).getName());
    }

    public static void main(String[] args) {

        printName("肌肉猿是真男人",RealHuman::new);
    }
}
此处的name -> new RealHuman(name)等价于RealHuman::new
6.数组构造器引用
声明:数组也是Object的子类,所以同样具有构造器,只是语法稍有不同
定义一个函数式接口
@FunctionalInterface
public interface ArrayBuilder {

    int[] buildArray(int length);
}
使用lambda表达式应用接口
public class DemoArrayInitRef {

    private static int[] initArray(int length,ArrayBuilder builder){

        return builder.buildArray(length);
    }

    public static void main(String[] args) {

        int[] array = initArray(10,length -> new int[length]);
    }
}
使用数组的构造器引用实现
public class DemoArrayInitRef2 {

    private static int[] initArray(int length,ArrayBuilder builder){

        return builder.buildArray(length);
    }

    public static void main(String[] args) {

        int[] array = initArray(10,int[]::new);
    }
}
智能推荐
Android实现部分文字可点击及变色_spannablestring clickspan 变色-程序员宅基地
文章浏览阅读1.4k次。可以使用SpannableString和ClickableSpan: TextView userAgreement = findViewById(R.id.user_agreement); SpannableString agreement = new SpannableString("Agree to the User Agreement and Privac..._spannablestring clickspan 变色
ollvm的ida trace操作笔记_ida trace 脚本-程序员宅基地
文章浏览阅读1.6k次。1.启动顺序操作记录1.把android_server push到手机里2.chmod 777 android_server3.adbforward tcp:11678 tcp:116784.ida->debugger->attach->arm-androddebugger5.再按f9把程序跑起来6.file->script_file->选择script.py加载ida脚本,成功后会有日志7.然后点击Debugger->breaklist里可以看到我们的断_ida trace 脚本
Mac M1 搭建 React Native 环境_mac 配置 react native 的打包环境-程序员宅基地
文章浏览阅读3.4k次。Mac M1 搭建 React Native 环境环境安装可以参考对照官方文档,本文针对M1芯片目前未完全适配情况下的方案,算是临时解决方案,不具有时效性。你需要自行准备的依赖:Xcode >10、Node >v12、Npm、Yarn、ruby、git更改编译环境首先要做的是进入 访达>应用程序>实用工具>右键 终端.app 显示简介>使用Rosetta打开勾选这一点极其重要,如果你使用的为其他终端工具,请勾选此选项,有关ffi的兼容问题,这只是临时解决方案_mac 配置 react native 的打包环境
SE壳C#程序-CrackMe-爆破 By:凉游浅笔深画眉 / Net7Cracker-程序员宅基地
文章浏览阅读644次。【文章标题】: 【SE壳C#程序-CrackMe-爆破】文字视频记录!【文章作者】: 凉游浅笔深画眉【软件名称】: CM区好冷清,我来发一个吧!小小草莓【下载地址】: http://www.52pojie.cn/thread-243089-1-1.html【加壳方式】: SE壳【使用工具】: OD+WinHex+CFF Explorer【作者声明】: 只是感兴趣,没有其他目的。失误之处敬请诸位大..._凉游浅笔画深眉是啥
安卓ttf格式的字体包_锤子科技定制字体 | Smartisan T黑-程序员宅基地
文章浏览阅读2k次。Smartisan·T黑2019年10月31日19:30分在北京工业大学奥林匹克体育馆举行的坚果手机2019新品发布会上,Smartisan OS产品经理朱海舟正式发布了Smartisan OS 7.0。随着全新的Smartisan OS 7.0一同亮相的还有锤子科技向方正字库订制的系统UI字体:Smartisan T黑(锤子T黑)。锤子T黑有着几乎完美的特质:灰度均衡、重心统一、中宫内..._smartisan t黑
Java中extends与implements使用方法_implements在java中的格式-程序员宅基地
文章浏览阅读4.8k次,点赞4次,收藏6次。一.extends关键字 extends是实现(单)继承(一个类)的关键字,通过使用extends 来显式地指明当前类继承的父类。只要那个类不是声明为final或者那个类定义为abstract的就能继承。其基本声明格式如下: [修饰符] class 子类名 extends 父类名{ 类体 }_implements在java中的格式
随便推点
webGl学习-程序员宅基地
文章浏览阅读127次。开个新坑,不知道能不能做完学习地址:mdn地址浏览器支持范围:支持范围首先是创建一个容器,与canvas的canvas.getContext('2d')相似let canvas = document.getElementById('myCanvas');let gl = canvas.getContext('webgl');_webgl学习
基于大数据的音乐推荐系统的设计与实现-程序员宅基地
文章浏览阅读1.7w次,点赞20次,收藏328次。系统提供的功能有,音乐管理:管理员可以添加删除音乐,音乐查找:用户可以在系统中自行查找想要听的歌曲,音乐推荐:系统在收集了用户的行为数据之后为用户个性化推荐音乐,用户管理:管理员可以对用户进行删除,评论管理:管理员可以对评论进行删除,音乐下载:用户可以自行下载个人喜欢分歌曲。选择数据源要确定数据源数据是否可靠真实,要避免爬取音乐平台发布的虚伪的音乐数据,如不存在的歌唱家、专辑、音乐等。通过分析基于大数据的音乐推荐系统,即音乐推荐需要哪些数据,详细了解推荐机制,搞清楚这些数据需要被处理为什么格式。_基于大数据的音乐推荐系统的设计与实现
Nginx反向代理缓存服务器搭建-程序员宅基地
文章浏览阅读672次。Nginx反向代理代理服务可简单的分为正向代理和反向代理:正向代理: 用于代理内部网络对Internet的连接请求(如×××/NAT),客户端指定代理服务器,并将本来要直接发送给目标Web服务器的HTTP请求先发送到代理服务器上, 然后由代理服务器去访问Web服务器,并将Web服务器的Response回传给客户端:反向代理: 与正向代理相反,如果局域网向Internet提供..._o /usr/local/server/ngx_cache_purge-2.3/config was found error: failed to ru
layui用table.render加载数据 用table.reload重载里面的数据---解决table.render重新加载闪动的问题_layui table.reload 闪退-程序员宅基地
文章浏览阅读2.7w次,点赞4次,收藏30次。今天在用layui 展示数据的时候,首先想到了table.render这个插件进行数据的展示,因为数据要实时刷新,说到实时刷新,你最低要三秒刷新一次表格的数据吧!!!一开始写了个定时把table.render放到定时函数里面,三秒执行一次函数,那么问题来了,虽然效果是实现了,但这是重新加载表格啊,三秒闪一次,别说是用户了,我都看不下去了,闪的眼疼,就想有没有只让数据重新加载,表格不动。终于功夫不负..._layui table.reload 闪退
Ubuntu系统突然进不去了_ubuntu开机无法进入系统-程序员宅基地
文章浏览阅读8.7k次,点赞5次,收藏37次。ubuntu系统突然进不去了!怎么办?_ubuntu开机无法进入系统
exe->startsap_startsap command not found-程序员宅基地
文章浏览阅读2.4k次。#!/bin/sh -#--------------------------------------------------------------------------version(){ echo '# @(#) $Id: //bas/742_REL/src/krn/startscripts/startsap#2 $'}## NAME : startsap or stopsa_startsap command not found