C++基础(Visual studio)_visual studio c++教程-程序员宅基地
技术标签: c++ visual studio 开发语言
一,基础语法
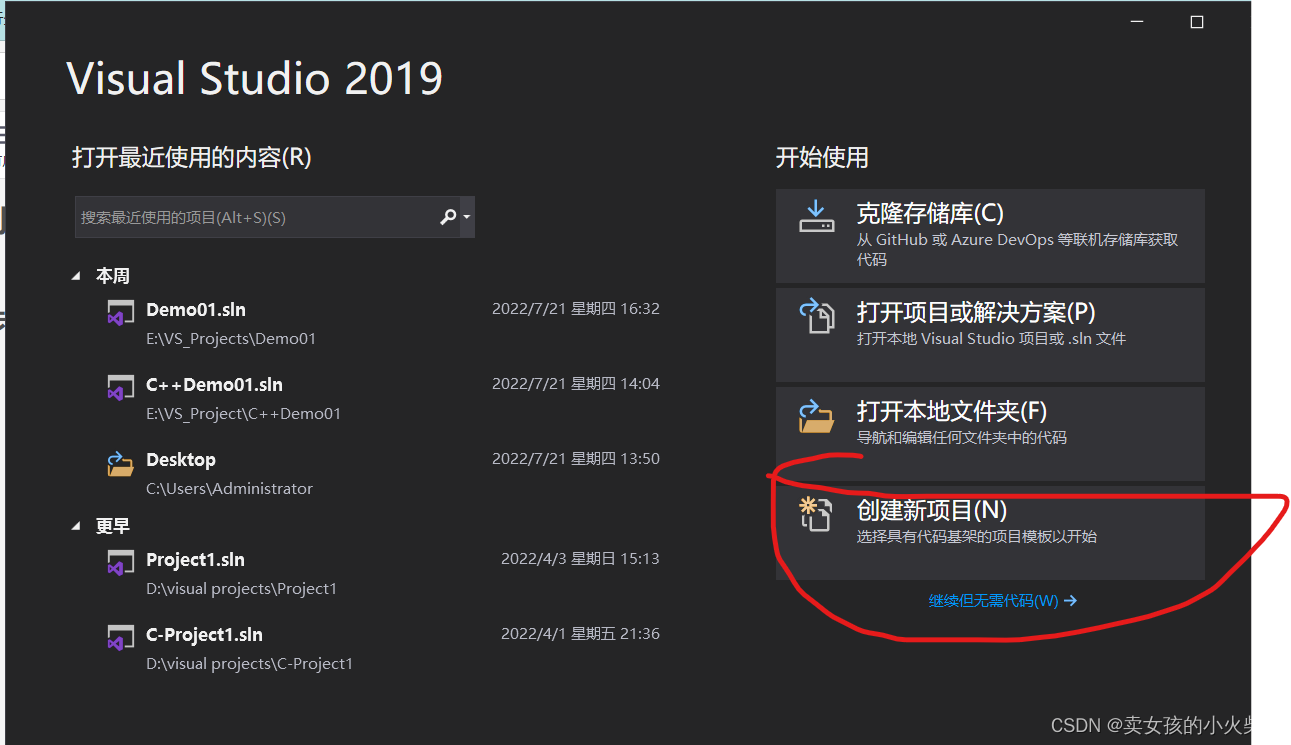
1.1运行一个程序的步骤
-
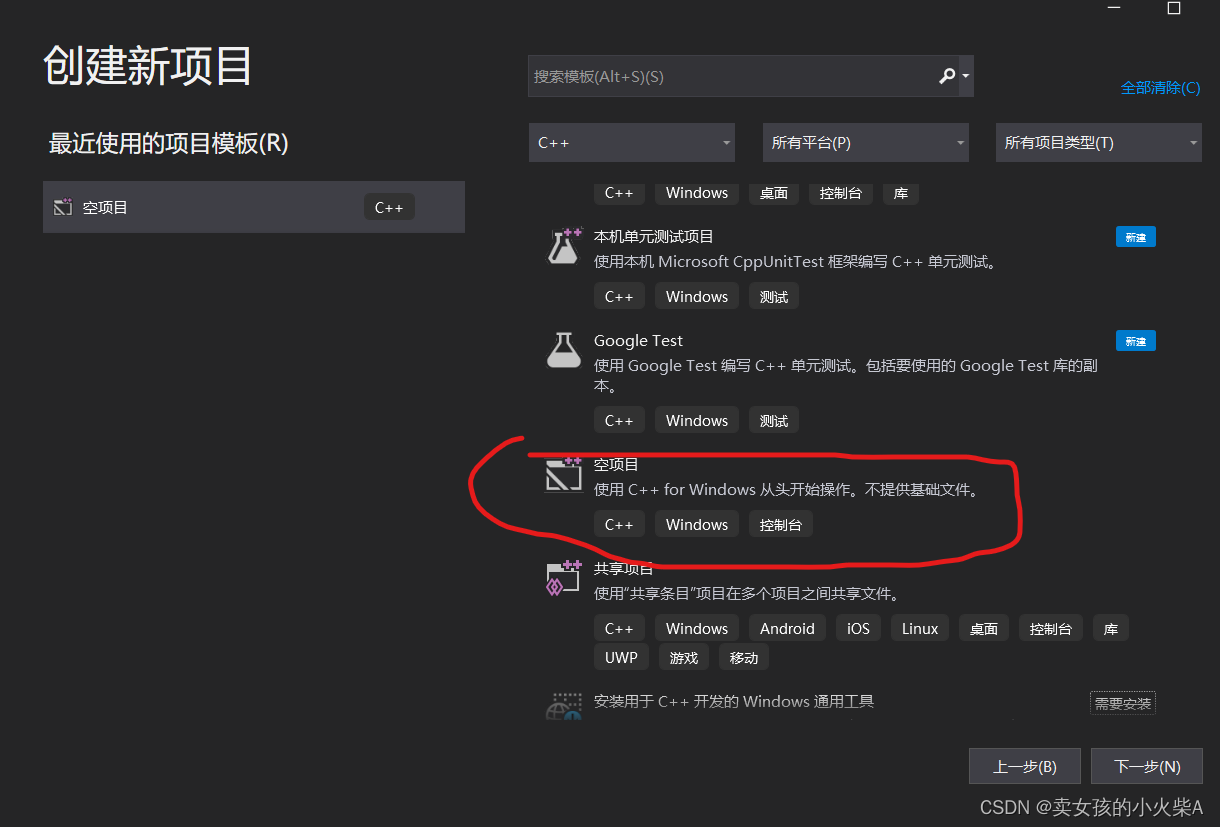
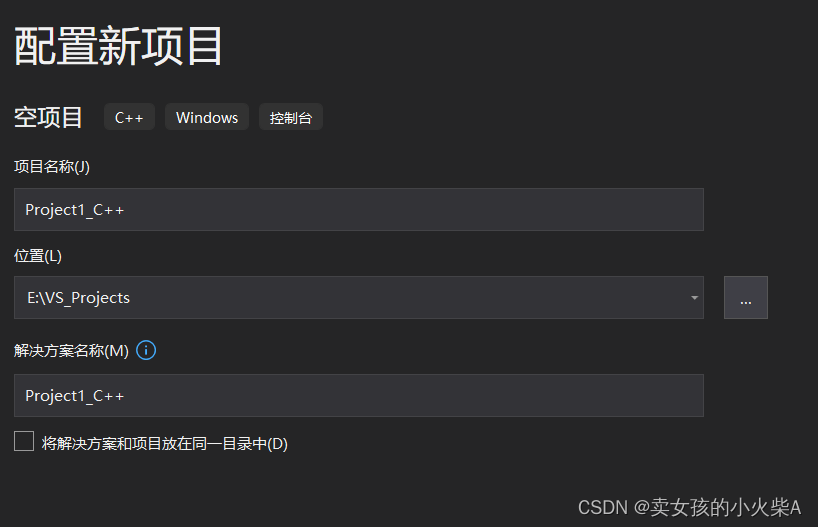
创建项目
-
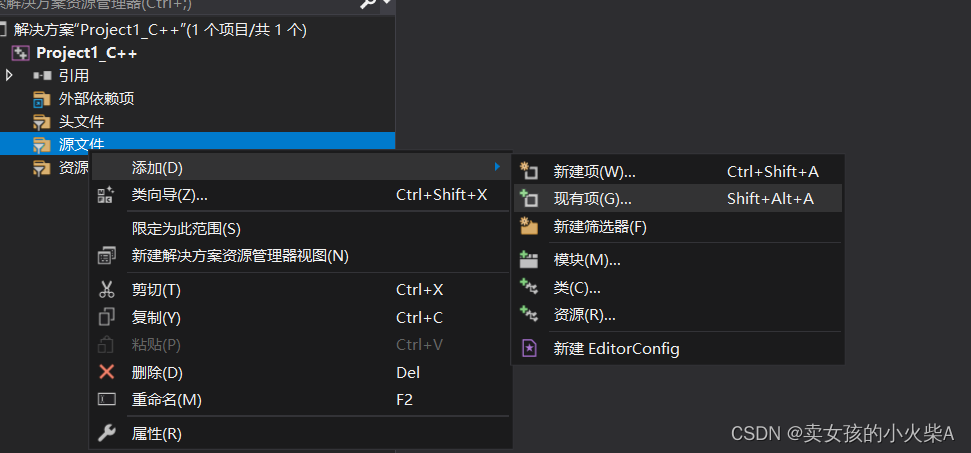
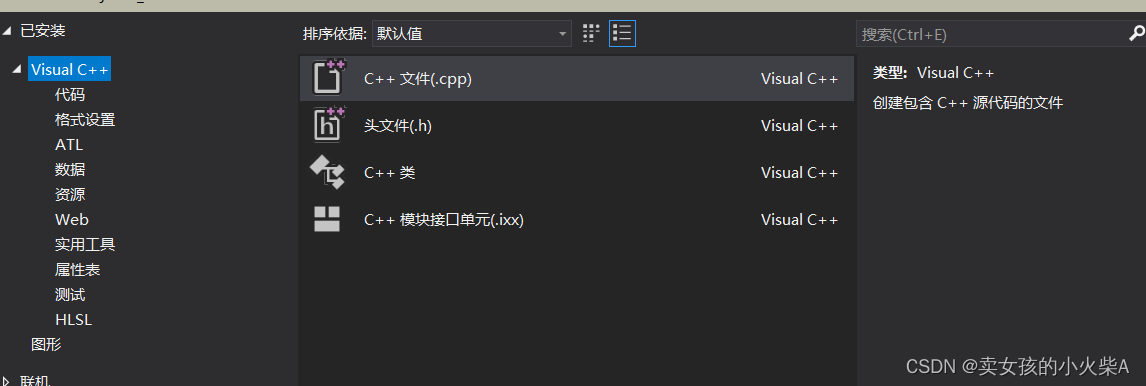
创建文件:源文件中添加新建项,在选中C++文件(.cpp)
-
编写代码
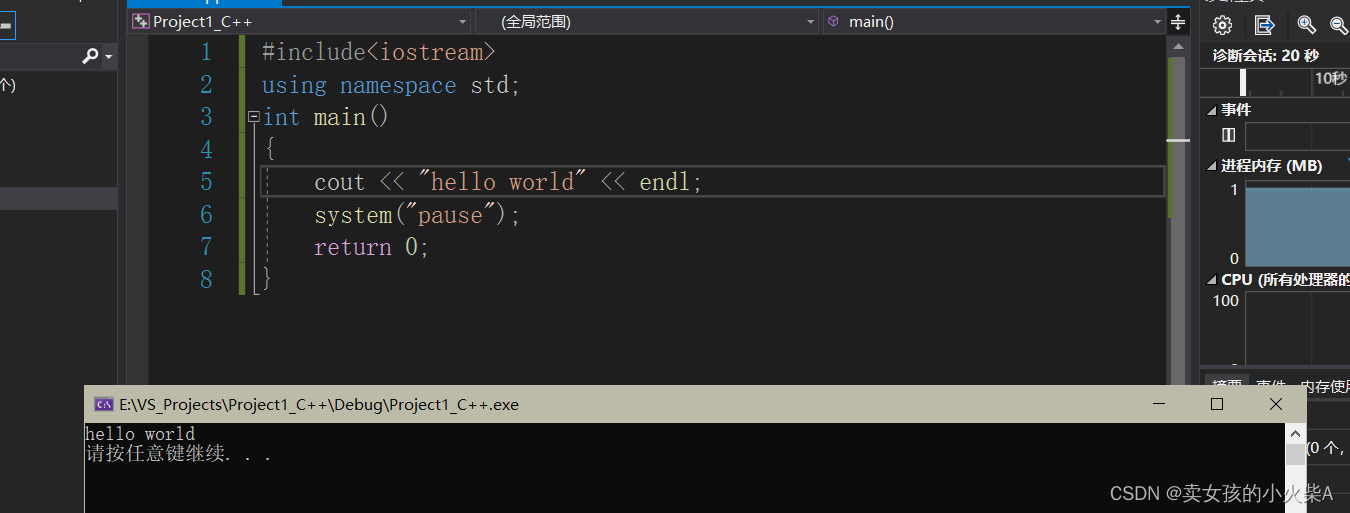
#include<iostream>
using namespace std;
int main()
{

	cout << "hello world" << endl;
	system("pause");
	return 0;
}
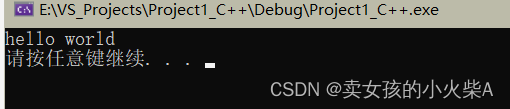
- 运行程序
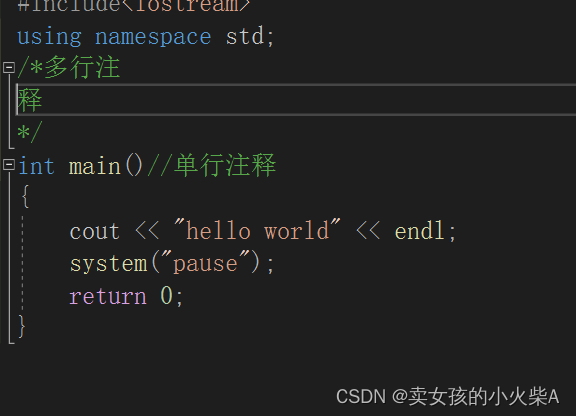
1.2注释
- 单行注释
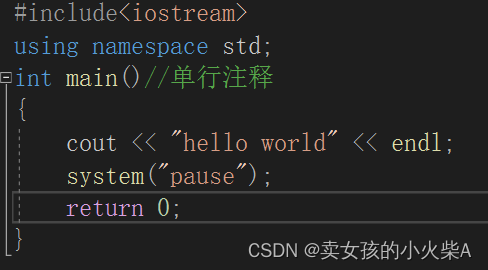
int main()//单行注释
- 多行注释
1.3变量
- 变量存在的意义:方便管理内存空间如将变量a指向某空间,操作时只需要使用a来操作,代替了16进制空间编号。
- 创建语法:数据类型 变量名=变量初始值
int a = 10;//创建变量
1.4常量
- 用于记录程序中不可更改的数据
- 两种定义方法:
- (1)#define 常量名 常量值
- (2)const关键字修饰的变量(通常定义在函数体里面):const 数据类型 常量名 =常量值
- (3)const对变量声明只读特性,保护变量值以防被修改。
#include<iostream>
using namespace std;
#define day 7//宏常量
int main()//单行注释
{

	cout << "hello world" << endl;
	int a = 10;//创建变量
	const int b = 5;//关键字修饰的变量
	system("pause");
	return 0;
}
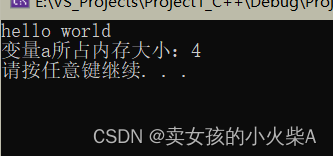
1.5sizeof关键字
- 作用:统计数据类型/变量所占内存大小
- 语法:sizeof(数据类型/变量)
#include<iostream>
using namespace std;
#define day 7//宏常量
int main()//单行注释
{

	cout << "hello world" << endl;
	int a = 10;//创建变量
	const int b = 5;//关键字修饰的变量
	cout << "变量a所占内存大小:" << sizeof(a) << endl;
	system("pause");
	return 0;
}
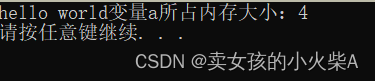
1.6C++输出语句endl与ends
- endl表示end of line此行输出结束并换行
- ends表示输出结束后空一格
#include<iostream>
using namespace std;
#define day 7//宏常量
int main()//单行注释
{

	cout << "hello world" << ends;//输出结束空格
	cout << "变量a所占内存大小:" << sizeof(a) << endl;//输出结束换行

	int a = 10;//创建变量
	const int b = 5;//关键字修饰的变量

	system("pause");
	return 0;
}
1.7数据类型
-
操作系统根据变量的数据类型来分配内存
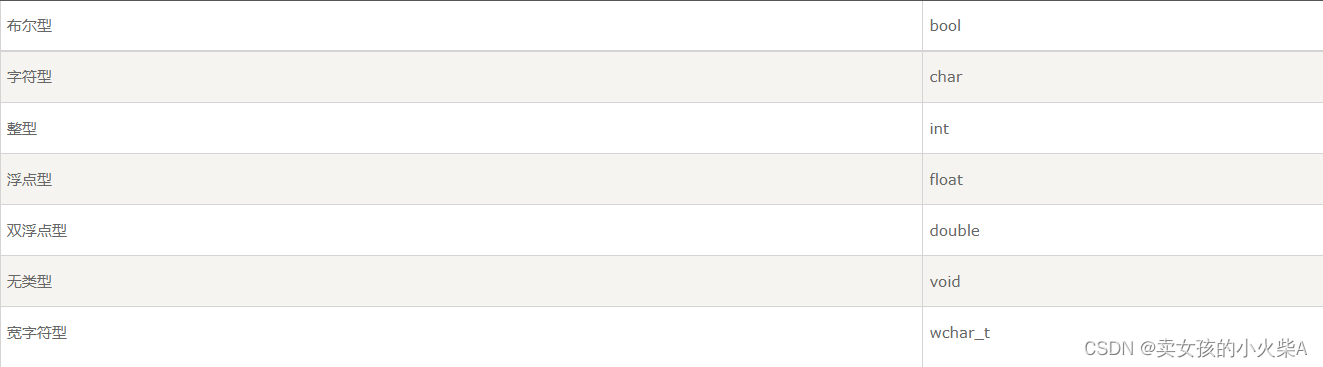
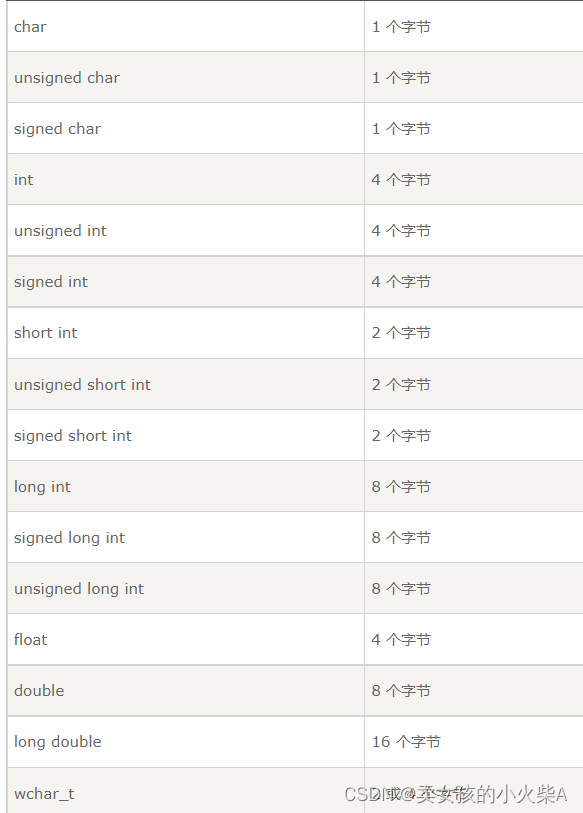
-
各种变量类型在内存中存储值时需要占用的内存
-
我们可以使用typedef来为已经存在的数据类型定义别名
typedef int f;//f的作用和int一样
f a=3;//a是一个整型变量
1.8枚举类型
- 枚举类型(enumeration)是C++中的一种派生数据类型,它是由用户定义的若干枚举常量的集合。
- enum 枚举名{
标识符[=整型常数],
标识符[=整型常数],
…
标识符[=整型常数]
} 枚举变量;
enum color {

 red,
 green,
  blue
} c;
c = blue;
- 变量 c 的类型为 color。最后,c 被赋值为 “blue”。
1.9数组
- 定义,初始化,引用
#include <iostream>
using namespace std;

#include <iomanip>
using std::setw;

int main ()
{

   int n[ 10 ]; // 定义数组:n 是一个包含 10 个整数的数组

   // 初始化数组元素
   for ( int i = 0; i < 10; i++ )
   {

      n[ i ] = i + 100; // 设置元素 i 为 i + 100
   }
   cout << "Element" << setw( 13 ) << "Value" << endl;

   // 输出数组中每个元素的值
   for ( int j = 0; j < 10; j++ )
   {

      cout << setw( 7 )<< j << setw( 13 ) << n[ j ] << endl;
   }

   return 0;
}
输出结果: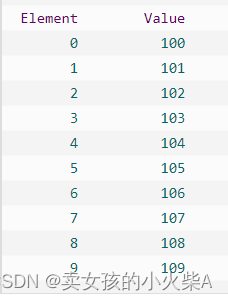
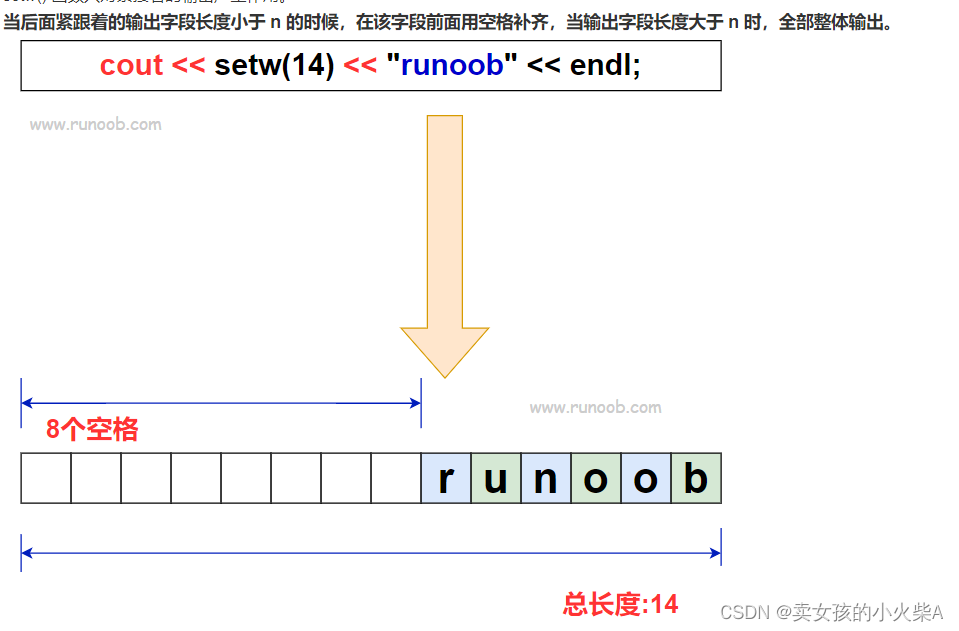
- setw()函数的使用:用于设置字段的宽度。
- 实例:
#include <iostream>
#include <iomanip>

using namespace std;

int main()
{

    // 开头设置宽度为 4,后面的 runoob 字符长度大于 4,所以不起作用
    cout << setw(4) << "runoob" << endl;
    // 中间位置设置宽度为 4,后面的 runoob 字符长度大于 4,所以不起作用
    cout << "runoob" << setw(4) << "runoob" << endl;
    // 开头设置间距为 14,后面 runoob 字符数为6,前面补充 8 个空格
    cout << setw(14) << "runoob" << endl;
    // 中间位置设置间距为 14 ,后面 runoob 字符数为6,前面补充 8 个空格
    cout << "runoob" << setw(14) << "runoob" << endl;
    return 0;
}
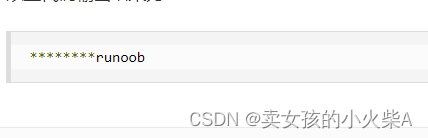
- setw() 默认填充的内容为空格,可以 setfill() 配合使用设置其他字符填充。
#include <iostream>
#include <iomanip>

using namespace std;

int main()
{

    cout << setfill('*')  << setw(14) << "runoob" << endl;
    return 0;
}
结果:
2.0指向数组的指针
-
指针是用来指向地址的:double Array[10];实际上Array是指向&Array[0]的指针,及数组Array的第一个地址。
-
把 p 赋值为 Aarray 的第一个元素的地址:一旦把第一个元素的地址存储在 p 中,您就可以使用 p、(p+1)、*(p+2) 等来访问数组元素。下面的实例演示了上面讨论到的这些概念:
double *p;
double Aarray[10];
p = Aarray;
- *(Aarray + 4) 是一种访问Aarray[4] 数据的合法方式
#include <iostream>
using namespace std;

int main ()
{

   // 带有 5 个元素的双精度浮点型数组
   double runoobAarray[5] = {
    1000.0, 2.0, 3.4, 17.0, 50.0};
   double *p;

   p = runoobAarray;

   // 输出数组中每个元素的值
   cout << "使用指针的数组值 " << endl;
   for ( int i = 0; i < 5; i++ )
   {

       cout << "*(p + " << i << ") : ";
       cout << *(p + i) << endl;
   }

   cout << "使用 runoobAarray 作为地址的数组值 " << endl;
   for ( int i = 0; i < 5; i++ )
   {

       cout << "*(runoobAarray + " << i << ") : ";
       cout << *(runoobAarray + i) << endl;
   }

   return 0;
}
2.2传递数组给函数
- 方式 1
形式参数是一个指针:
void myFunction(int *param)
{

.
.
.
}
- 方式 2
形式参数是一个已定义大小的数组:
void myFunction(int param[10])
{

.
.
.
}
- 方式 3
形式参数是一个未定义大小的数组:
void myFunction(int param[])
{

.
.
.
}
#include<iostream>
using namespace std;

int getAverage(int arr[],int size)
{

	int i, sum = 0;
	double aver;

	for ( i = 0; i < size; i++)
	{

		sum += arr[i];
	}
	aver = double(sum) / size;
	return aver;

}
int main()
{

	// 带有 5 个元素的整型数组
	int balance[5] = {
     1000, 2, 3, 17, 50 };
	double avg;

	// 传递一个指向数组的指针作为参数
	avg = getAverage(balance, 5);

	// 输出返回值
	cout << "平均值是:" << avg << endl;

	return 0;
}
2.3函数的分文件编写
- 当创建的函数较少时,可以将函数与主函数写在同一个文件中,但是当项目较大使用的函数较多时,另创文件存储函数管理起来较为方便。
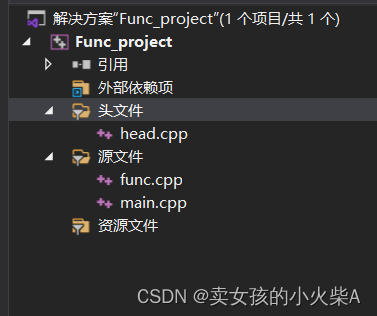
- 创建三个文件:head.h起到声明作用,func.cpp用来写函数,main.cpp用来写主函数。
- head.h
#include<iostream>
using namespace std;
void swap(int& a, int& b);
- func.cpp
#include "head.h"//包含头文件

void swap(int &a, int &b)
{

	int temp;
	temp = a;
	a = b;
	b = temp;

}
7.main.cpp
#include<iostream>
#include "head.h"
using namespace std;
int main()
{

	int x, y;
	x = 10;
	y = 7;
	cout << x << y << endl;
	swap(x, y);
	cout << x << y << endl;
}
2.4指针
- 每一个变量都有一个内存位置,每一个内存位置都定义了可使用连字号(&)运算符访问的地址,它表示了在内存中的一个地址。指针也是一个变量,用来存储这些地址。
- 指针变量的定义:不管是整型、浮点型、字符型,还是其他的数据类型,都是一样的,都是一个代表内存地址的长的十六进制数
int    *ip;    /* 一个整型的指针 */
double *dp;    /* 一个 double 型的指针 */
float  *fp;    /* 一个浮点型的指针 */
char   *ch;    /* 一个字符型的指针 */`
- 使用指针:定义一个指针变量、把变量地址赋值给指针、访问指针变量中可用地址的值
- 实例:
#include <iostream>

using namespace std;

int main ()
{

   int  var = 20;   // 实际变量的声明
   int  *ip;        // 指针变量的声明

   ip = &var;       // 在指针变量中存储 var 的地址

   cout << "Value of var variable: ";
   cout << var << endl;

   // 输出在指针变量中存储的地址
   cout << "Address stored in ip variable: ";
   cout << ip << endl;

   // 访问指针中地址的值
   cout << "Value of *ip variable: ";
   cout << *ip << endl;

   return 0;
}
2.5指针与数组
- 定义好数组后只需要将数组名赋值给指针即可,不需要加&取地址符。因为数组名指向的就是数组第一个元素的地址。赋值后相当于指针指向数组的第一个元素地址。
 int  var[MAX] = {
    10, 100, 200};
   int  *ptr;

   // 指针中的数组地址
   ptr = var;
- 通过对指针进行加减运算来指向数组中不同的元素。
 // 移动到下一个位置
      ptr++;
2.6指针数组
- 指针数组=数组,是一个用来存储指针(变量地址)的数组。
#include <iostream>

using namespace std;
const int MAX = 3;

int main ()
{

   int  var[MAX] = {
    10, 100, 200};
   int *ptr[MAX];//定义指针数组

   for (int i = 0; i < MAX; i++)
   {

      ptr[i] = &var[i]; // 赋值为整数的地址
   }
   for (int i = 0; i < MAX; i++)
   {

      cout << "Value of var[" << i << "] = ";
      cout << *ptr[i] << endl;
   }
   return 0;
}
Value of var[0] = 10
Value of var[1] = 100
Value of var[2] = 200
2.7指向指针的指针
- 定义方式:int **pprt,一个指针包含一个变量的地址。当我们定义一个指向指针的指针时,第一个指针包含了第二个指针的地址,第二个指针指向包含实际值的位置。是一种多级间接寻址。

#include <iostream>

using namespace std;

int main ()
{

    int  var;
    int  *ptr;
    int  **pptr;

    var = 3000;

    // 获取 var 的地址
    ptr = &var;

    // 使用运算符 & 获取 ptr 的地址
    pptr = &ptr;

    // 使用 pptr 获取值
    cout << "var 值为 :" << var << endl;
    cout << "*ptr 值为:" << *ptr << endl;
    cout << "**pptr 值为:" << **pptr << endl;

    return 0;
}
2.8结构体
2.8.1结构体定义与使用
- 使用struct语句定义结构体,属于用户自定义的数据类型。
- 结构体创建变量的方式:(1)struct 结构体名 变量名
(2)struct 结构体名 变量名={成员值1,成员值2,…}(3)定义结构体时顺便创建变量
#include<iostream>
#include<string>
using namespace std;
//结构体定义
struct student {

	string name;
	int age;
	int score;

}stu3;//结构体变量创建方式3
int main() {

	//结构体变量创建方式1
	struct student stu1;//struct关键字可以省略
	stu1.age = 20;
	stu1.name = "jack";
	stu1.score = 82;

	cout << stu1.name <<" " << stu1.age << " " << stu1.score<<endl;
	//结构体变量创建方式2
	struct student stu2 = {
    "李四",18,90};
	cout << stu2.name << " " << stu2.age << " " << stu2.score;
}
2.8.2结构体数组
- 作用:将自定义的结构体放到数组中方便维护。
- 语法:struct 结构体名 素组名[数组元素个数={ {},{},{},…}
- 步骤:先定义好结构体及内部元素,主函数定义数组:
#include<iostream>
#include<string>
using namespace std;
//1.定义结构体
struct Student {

	string name;
	int age;
	int score;

};
int main() {

	//2.1创建结构体数组,方法一,定义时赋值
	struct Student stuArray[3] = {

		{
    "张三",18,80},
		{
    "李四",20,62},
		{
    "王五",23,72}
	};
	//2.2结构体数组元素单独赋值
	stuArray[2].age = 50;
	//3.遍历数组成员
	for(int i = 0; i<3; i++ ){

		cout << "姓名" << stuArray[i].name << endl;
	}

}
2.8.3结构体指针
- 指向结构体的指针:访问成员要用->访问符。
- 定义:
struct Books *struct_pointer;
- 将结构体地址赋值给指针:
struct_pointer = &Book1;
- 访问结构体成员:
struct_pointer->title;
- 实例:
#include<iostream>
#include<string>
using namespace std;
//1.定义结构体
struct Student {

	string name;
	int age;
	int score;

};
int main() {

	//创建结构体变量
	struct Student stu1 = {
    "张三",18,100};
	//通过指针指向结构体变量,struct可以省略
	struct Student* p=&stu1;
	//指针访问结构体属性
	cout << "姓名:" << p->name << endl;

}
2.8.4结构体嵌套结构体
- 在结构体中可以定义另一个结构体作为成员,用来解决实际问题。
#include<iostream>
#include<string>
using namespace std;
//定义学生结构体
struct Student {

	string name;
	int age;
	int score;

};
//定义老师结构体并嵌套学生结构体
struct Teacher {

	string name;
	int age;
	int id;
	struct Student stu1;//学生

};
int main() {

	//结构体变量创建方式1
	struct Teacher t1;//struct关键字可以省略
	t1.age = 20;
	t1.name = "jack";
	t1.id = 123;
	t1.stu1.score = 80;
	t1.stu1.age = 17;
	t1.stu1.name = "小王";

	cout << "老师姓名" <<t1.name<< "老师年龄" << t1.age << "老师工号" <<t1.id<< endl;

	cout <<t1.stu1.name << " " << t1.stu1.age << " " << t1.stu1.score;
}
- typedef给结构体起别名:Books2,后面定义Book类型结构体时不需要加struct。
typedef struct Books
{

   char  title[50];
   char  author[50];
   char  subject[100];
   int   book_id;
}Books2;
Books2 Book1, Book2;//创建结构体变量
2.8.5结构体作为函数参数
- 值传递:
#include<iostream>
#include<string>
using namespace std;
//1.定义结构体
struct Student {

	string name;
	int age;
	int score;

};
//创建函数
void printStudent(struct Student s) {

	cout << "姓名:" << s.name << endl;
}
int main() {

	//创建结构体变量
	struct Student stu1 = {
    "张三",18,100};
	printStudent(stu1);


}
- 传地址:
- 潜在问题1:当数据量特别大时,由于是值传递,会再复制一份参数数据,占用大量内存空间。
- 解决方法:将值传递改为传地址,形参定义为指针,也就多占了一个指针的内存,不会复制新的代码。
#include<iostream>
#include<string>
using namespace std;
//1.定义结构体
struct Student {

	string name;
	int age;
	int score;

};
//创建函数
void printStudent(struct Student *p)//更改2
{

	cout << "姓名:" << p->name << endl;
	cout << "年龄:" << p->age << endl;
	cout << "分数:" << p->score << endl;
}
int main() {

	//创建结构体变量
	struct Student stu1 = {
    "张三",18,100};
	printStudent(&stu1);//更改1


}
- 潜在问题2:在进行地址传递时,指针p在函数体中可以对原存储空间内的内容进行修改,甚至有时会造成误操作修改了数据,例如:
#include<iostream>
#include<string>
using namespace std;
//1.定义结构体
struct Student {

	string name;
	int age;
	int score;

};
//创建函数
void printStudent(struct Student *p)//更改2
{

	p->age = 80;//对结构体变量的数值进行修改
	cout << "修改后的年龄:" << p->age << endl;

}
int main() {

	//创建结构体变量
	struct Student stu1 = {
    "张三",18,100};
	cout << "修改前的年龄:" << stu1.age<< endl;

	printStudent(&stu1);//更改1


}
- 解决办法:为了防止在函数体中修改原数据,可在定义形参时加上const关键字。
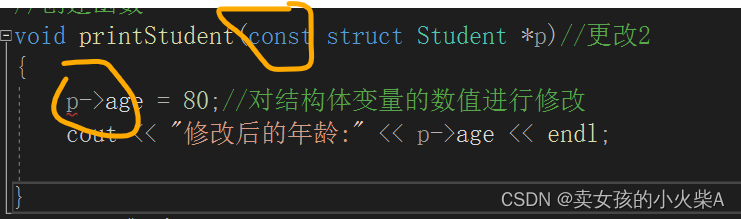
- 加上const关键字后,若函数体内对数据进行修改会报错。
智能推荐
oracle 12c 集群安装后的检查_12c查看crs状态-程序员宅基地
文章浏览阅读1.6k次。安装配置gi、安装数据库软件、dbca建库见下:http://blog.csdn.net/kadwf123/article/details/784299611、检查集群节点及状态:[root@rac2 ~]# olsnodes -srac1 Activerac2 Activerac3 Activerac4 Active[root@rac2 ~]_12c查看crs状态
解决jupyter notebook无法找到虚拟环境的问题_jupyter没有pytorch环境-程序员宅基地
文章浏览阅读1.3w次,点赞45次,收藏99次。我个人用的是anaconda3的一个python集成环境,自带jupyter notebook,但在我打开jupyter notebook界面后,却找不到对应的虚拟环境,原来是jupyter notebook只是通用于下载anaconda时自带的环境,其他环境要想使用必须手动下载一些库:1.首先进入到自己创建的虚拟环境(pytorch是虚拟环境的名字)activate pytorch2.在该环境下下载这个库conda install ipykernelconda install nb__jupyter没有pytorch环境
国内安装scoop的保姆教程_scoop-cn-程序员宅基地
文章浏览阅读5.2k次,点赞19次,收藏28次。选择scoop纯属意外,也是无奈,因为电脑用户被锁了管理员权限,所有exe安装程序都无法安装,只可以用绿色软件,最后被我发现scoop,省去了到处下载XXX绿色版的烦恼,当然scoop里需要管理员权限的软件也跟我无缘了(譬如everything)。推荐添加dorado这个bucket镜像,里面很多中文软件,但是部分国外的软件下载地址在github,可能无法下载。以上两个是官方bucket的国内镜像,所有软件建议优先从这里下载。上面可以看到很多bucket以及软件数。如果官网登陆不了可以试一下以下方式。_scoop-cn
Element ui colorpicker在Vue中的使用_vue el-color-picker-程序员宅基地
文章浏览阅读4.5k次,点赞2次,收藏3次。首先要有一个color-picker组件 <el-color-picker v-model="headcolor"></el-color-picker>在data里面data() { return {headcolor: ’ #278add ’ //这里可以选择一个默认的颜色} }然后在你想要改变颜色的地方用v-bind绑定就好了,例如:这里的:sty..._vue el-color-picker
迅为iTOP-4412精英版之烧写内核移植后的镜像_exynos 4412 刷机-程序员宅基地
文章浏览阅读640次。基于芯片日益增长的问题,所以内核开发者们引入了新的方法,就是在内核中只保留函数,而数据则不包含,由用户(应用程序员)自己把数据按照规定的格式编写,并放在约定的地方,为了不占用过多的内存,还要求数据以根精简的方式编写。boot启动时,传参给内核,告诉内核设备树文件和kernel的位置,内核启动时根据地址去找到设备树文件,再利用专用的编译器去反编译dtb文件,将dtb还原成数据结构,以供驱动的函数去调用。firmware是三星的一个固件的设备信息,因为找不到固件,所以内核启动不成功。_exynos 4412 刷机
Linux系统配置jdk_linux配置jdk-程序员宅基地
文章浏览阅读2w次,点赞24次,收藏42次。Linux系统配置jdkLinux学习教程,Linux入门教程(超详细)_linux配置jdk
随便推点
matlab(4):特殊符号的输入_matlab微米怎么输入-程序员宅基地
文章浏览阅读3.3k次,点赞5次,收藏19次。xlabel('\delta');ylabel('AUC');具体符号的对照表参照下图:_matlab微米怎么输入
C语言程序设计-文件(打开与关闭、顺序、二进制读写)-程序员宅基地
文章浏览阅读119次。顺序读写指的是按照文件中数据的顺序进行读取或写入。对于文本文件,可以使用fgets、fputs、fscanf、fprintf等函数进行顺序读写。在C语言中,对文件的操作通常涉及文件的打开、读写以及关闭。文件的打开使用fopen函数,而关闭则使用fclose函数。在C语言中,可以使用fread和fwrite函数进行二进制读写。 Biaoge 于2024-03-09 23:51发布 阅读量:7 ️文章类型:【 C语言程序设计 】在C语言中,用于打开文件的函数是____,用于关闭文件的函数是____。
Touchdesigner自学笔记之三_touchdesigner怎么让一个模型跟着鼠标移动-程序员宅基地
文章浏览阅读3.4k次,点赞2次,收藏13次。跟随鼠标移动的粒子以grid(SOP)为partical(SOP)的资源模板,调整后连接【Geo组合+point spirit(MAT)】,在连接【feedback组合】适当调整。影响粒子动态的节点【metaball(SOP)+force(SOP)】添加mouse in(CHOP)鼠标位置到metaball的坐标,实现鼠标影响。..._touchdesigner怎么让一个模型跟着鼠标移动
【附源码】基于java的校园停车场管理系统的设计与实现61m0e9计算机毕设SSM_基于java技术的停车场管理系统实现与设计-程序员宅基地
文章浏览阅读178次。项目运行环境配置:Jdk1.8 + Tomcat7.0 + Mysql + HBuilderX(Webstorm也行)+ Eclispe(IntelliJ IDEA,Eclispe,MyEclispe,Sts都支持)。项目技术:Springboot + mybatis + Maven +mysql5.7或8.0+html+css+js等等组成,B/S模式 + Maven管理等等。环境需要1.运行环境:最好是java jdk 1.8,我们在这个平台上运行的。其他版本理论上也可以。_基于java技术的停车场管理系统实现与设计
Android系统播放器MediaPlayer源码分析_android多媒体播放源码分析 时序图-程序员宅基地
文章浏览阅读3.5k次。前言对于MediaPlayer播放器的源码分析内容相对来说比较多,会从Java-&amp;gt;Jni-&amp;gt;C/C++慢慢分析,后面会慢慢更新。另外,博客只作为自己学习记录的一种方式,对于其他的不过多的评论。MediaPlayerDemopublic class MainActivity extends AppCompatActivity implements SurfaceHolder.Cal..._android多媒体播放源码分析 时序图
java 数据结构与算法 ——快速排序法-程序员宅基地
文章浏览阅读2.4k次,点赞41次,收藏13次。java 数据结构与算法 ——快速排序法_快速排序法